
In This Article
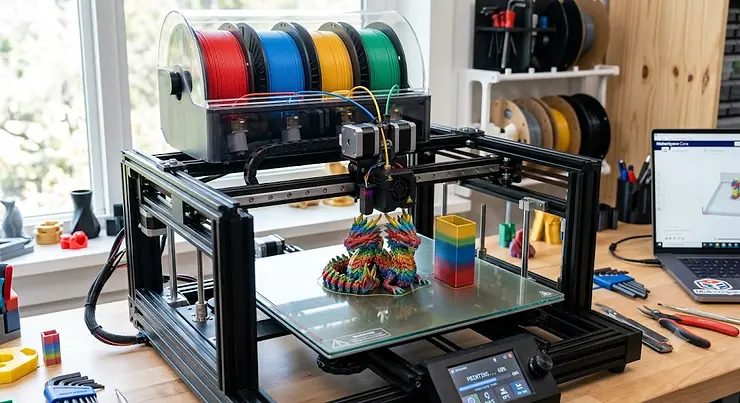
Right, let’s get one myth out of the way immediately: nobody wakes up one morning and casually decides to buy a multi-colour FDM 3D printer. It usually starts with a single-colour benchy, a mild sense of pride, and then the slow, creeping realisation that everything you print from now on looks like it was dipped in a single tin of Dulux. A multi-colour FDM 3D printer is a fused deposition modelling machine that automatically feeds two or more filament spools into the same print job, swapping colours or materials mid-layer without you standing over it with a screwdriver. That’s the whole concept in one breath, and it’s the reason this category has exploded from a niche hobbyist trick into a genuine mainstream feature in 2026. If you want the deeper technical background on how fused filament fabrication actually deposits material layer by layer, it’s worth a quick read before you dive into buying decisions.
The engineering behind it isn’t new in principle. Long before Bambu Lab’s X1-Carbon arrived in 2022 and reset expectations for the whole category, makers were already attempting colour switching with clunky dual-nozzle IDEX setups or expensive third-party filament-splicing add-ons, and honestly, most of those early systems were fiddly enough to put people off entirely. What’s changed is reliability. Automated Material Systems, Colour Feeding Systems and toolchangers have matured into appliances you genuinely can leave running overnight, which is precisely why this guide exists.
Below, we’ve dug into seven real machines spanning entry-level colour dabbling right up to zero-waste toolchanging rigs, with honest analysis of what the spec sheets mean in practice, where a multi-material 3D printer earns its keep, and where a plain colour-changing 3D printer with manual swaps will do the job just as well for less money. Everything here is grounded in verifiable specifications and aggregated review sentiment — not invented hands-on testing — because that’s the only honest way to write this kind of guide.
Quick Comparison Table
If you’ve got thirty seconds and a strong coffee, here’s the shortcut version before we go deep on each machine.
| Printer | System Type | Colours | Best For | Price Range |
|---|---|---|---|---|
| Bambu Lab A1 mini Combo | AMS lite | 4 | First-time buyers, small figurines | Under £350 |
| Bambu Lab A1 Combo | AMS lite | 4 | Best all-round value | £350-450 range |
| Bambu Lab P2S Combo | AMS 2 Pro | 4 (expandable) | Most people upgrading from single colour | £600-700 range |
| Anycubic Kobra S1 Combo | ACE Pro | 4-8 | Budget alternative to Bambu with built-in drying | £500-600 range |
| Creality K2 Plus Combo | CFS | Up to 16 | Large-format, cosplay and terrain builds | £1,100-1,300 range |
| Snapmaker U1 | Toolchanger | 4 (zero-waste) | Frequent multi-colour printers who hate purge waste | £850-950 range |
| Prusa XL (5-toolhead) | Toolchanger | 5 (zero-waste) | Professional and small-business production | £2,500-2,800 range |
A few things jump out here that are worth unpacking before you scroll further. First, price does not scale neatly with colour count — the Snapmaker U1 and the four-spool Bambu Lab P2S Combo both handle four filaments, yet they arrive at that outcome through completely different mechanisms with very different running costs. Second, the jump from AMS-style purging systems to toolchangers isn’t really about “more colours,” it’s about eliminating the filament waste that purging systems generate every single colour change. If you’re printing the occasional dual-colour keyring, that waste is trivial; if you’re running a print farm churning out 16-colour terrain tiles, it becomes a real line item on your filament budget.
💬 Already got a favourite in mind? Scroll down to see the full breakdown before you commit 🤗
Top 7 Multi-Colour FDM 3D Printers: Expert Analysis
We’ve deliberately spread this list across budget, mid-range and premium tiers, and across all three dominant multi-colour technologies on the market in 2026: purging systems (AMS, CFS, ACE Pro), and toolchangers. Purging systems share one nozzle between colours, retracting the old filament, feeding in the new one, then flushing the mixed material into a waste chute or tower before printing resumes. Toolchangers such as the Snapmaker U1 and Prusa XL take a different route entirely, swapping in a completely separate, dedicated printhead for each colour, which avoids the purge-waste problem altogether. Neither approach is universally “better” — they’re better for different buyers, which is exactly what we’ll unpack product by product.
Here’s the full spec comparison before we dive into individual verdicts:
| Printer | Build Volume | Max Speed | Colours | Best For |
|---|---|---|---|---|
| Bambu Lab A1 mini Combo | 180×180×180mm | 500mm/s | 4 | Compact desks, first purchase |
| Bambu Lab A1 Combo | 256×256×256mm | 500mm/s | 4 | Best value multi-colour |
| Bambu Lab P2S Combo | 256×256×256mm | 600mm/s | 4+ (chainable) | All-round upgrade pick |
| Anycubic Kobra S1 Combo | 250×250×250mm | 600mm/s | 4-8 | Budget-conscious buyers |
| Creality K2 Plus Combo | 350×350×350mm | 600mm/s | Up to 16 | Large, complex multi-colour builds |
| Snapmaker U1 | 230×230×250mm | High-speed, toolchanger | 4 | Zero-waste frequent colour changes |
| Prusa XL (5-toolhead) | 360×360×360mm | Toolchanger | 5 | Production and mixed-material parts |
Looking at that table, the pattern that matters most is build volume versus colour ceiling. The Creality K2 Plus Combo‘s 350mm cube isn’t just “bigger for the sake of it” — it’s the difference between printing a full-size cosplay helmet in one continuous piece with clean colour registration, versus splitting it into sections on a 220mm printer and fighting visible seams during assembly. Meanwhile, buyers chasing genuinely low waste per colour change should be looking at the toolchanging Snapmaker U1 and Prusa XL, not at colour count, since both handle four-plus materials with virtually nothing lost to purge towers.
1. Bambu Lab A1 mini Combo — smallest footprint, still four-colour capable
The A1 mini Combo squeezes genuine multi-colour printing into a machine that fits on a bedside table, and that compactness is the entire pitch. Its 180x180x180mm build volume with the AMS lite attached rules out anything ambitious, but for keyrings, miniatures, cosplay accessories and classroom projects it’s more than enough room to work with. The bed-slinger CoreXY hybrid motion system keeps costs down while still delivering respectable print speeds for a machine at this price point.
Specs-wise, the AMS lite handles four spools through a single hotend, and full-auto calibration means there’s genuinely very little to configure before your first print. Full-metal linear rails on both axes are a small but meaningful detail — cheaper printers at this size often cut corners with plastic guides that wear quickly under repeated use, and that translates to consistent layer lines even after months of daily printing.
Based on the spec comparison against other entry-level machines, this is squarely aimed at first-time buyers who want to try multi-colour printing without committing serious money, students, and parents buying a first printer for a curious teenager. Reviewers consistently note that the small build volume is the main compromise, not print quality, which tends to hold up well for its size class.
Pros:
- ✅ Genuinely affordable entry point into AMS-based colour printing
- ✅ Compact enough for a small desk or shelf
- ✅ Full-auto calibration removes most setup friction
Cons:
- ❌ 180mm build volume limits larger or multi-part projects
- ❌ Open-frame design means no chamber temperature control
At around £280-350 for the Combo bundle at the time of research, the A1 mini Combo represents genuinely strong value for anyone testing the water before committing to a bigger machine — check current price before buying, as bundle promotions shift regularly.
2. Bambu Lab A1 Combo — best all-round value for multi-material printing
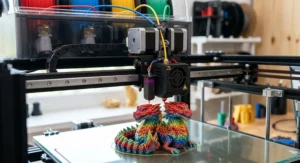
Step up to the full-size A1 and you get a meaningfully larger 256x256x256mm build volume paired with the same AMS lite system, which is why this has become the default recommendation for most people asking about a multi-material 3D printer on a sensible budget. The steel-and-extruded-aluminium frame with high-quality linear rails on the X and Z axes gives it noticeably more rigidity than the mini, which matters once you’re printing taller, more detailed models.
The quick-swap all-metal hotend with a stainless-steel 0.4mm nozzle means material changes (say, switching from PLA to a more abrasive filament) don’t require a full teardown, and the eddy current pressure sensor actively compensates flow rate in real time rather than relying on static settings. What most buyers overlook about this model is that the AMS lite continuously monitors filament consumption and auto-switches to a fresh spool when one runs dry, which avoids the classic failed-print-at-3am scenario that plagued earlier budget colour systems.
Reviewers consistently report that print quality out of the box rivals machines costing considerably more, with the main criticism being noise levels during rapid, high-acceleration moves — though Bambu’s motor noise cancelling tuning has genuinely improved this over earlier revisions.
Pros:
- ✅ Full 256mm build volume at a genuinely accessible price
- ✅ Reliable auto spool-switching avoids mid-print failures
- ✅ Strong community support and slicer integration
Cons:
- ❌ AMS lite only supports one unit per printer, capping colours at four
- ❌ No enclosed chamber, so ABS and similar materials underperform
Typically priced in the £350-450 range for the Combo bundle, this is the machine we’d point most beginners and hobbyists toward first — it balances capability against cost better than almost anything else in this list.
3. Bambu Lab P2S Combo — the most polished multi-colour ecosystem right now
The P2S pairs one of the market’s most refined colour ecosystems with genuine real-world speeds up to 600mm/s, and the AMS 2 Pro fixes the one thing the first-generation AMS lacked: active drying built into the unit itself, so loaded spools stay printable even in a humid room instead of slowly absorbing moisture on the shelf. That drying capability alone solves one of the most common failure points in multi-colour printing — moisture-absorbed filament causing stringing, popping and weak layer bonds, which is a genuinely common complaint across cheaper systems that lack any drying function.
Under the hood, a PMSM servo extruder delivers substantially more extrusion force than the previous P1S generation, which translates into more stable output at high flow rates — useful when you’re printing large single-colour sections quickly before switching. The enclosed chamber with adaptive airflow control also opens the door to engineering filaments like ABS and ASA that the open-frame A1 series simply can’t handle reliably.
Based on the spec comparison, this is the machine for anyone upgrading from a first printer who wants noticeably better speed, an enclosed chamber, and the option to daisy-chain additional AMS units later for up to sixteen colours. Reviewers frequently cite the fully assembled, arrives-ready-to-print experience as a major advantage over machines that demand hours of user assembly.
Pros:
- ✅ Active filament drying built into the AMS 2 Pro unit
- ✅ Enclosed chamber unlocks engineering-grade materials
- ✅ Expandable to sixteen colours by chaining extra AMS units
Cons:
- ❌ Noticeably pricier than the A1 Combo for a similar colour count
- ❌ Purging still wastes several grams of filament per colour change
Sitting in the £600-700 range for the full Combo, this is our pick for most people who’ve outgrown a budget printer and want the most complete package currently available — the AMS ecosystem, software polish and material versatility genuinely justify the step up.
4. Anycubic Kobra S1 Combo — the value-focused alternative with built-in drying
If the Bambu ecosystem doesn’t appeal, or you simply want a genuine second option to compare against, the Kobra S1 Combo is where most buyers land. The ACE Pro system handles four colours out of the box and expands to eight once you add a second unit, and its standout feature is a built-in filament dryer. That matters because hygroscopic materials — nylon, PETG, PVA, and even ordinary PLA left in a damp room — soak up moisture that causes bubbling, stringing and weak layer adhesion once printed. That’s a meaningful advantage over systems without drying, because it removes the need to buy a separate filament dryer, which most serious multi-colour users otherwise end up purchasing anyway.
The LeviQ auto-levelling system with Z-offset compensation removes one of the more tedious setup steps on cheaper printers, and a 4.3-inch touchscreen that tilts between 30 and 60 degrees is a small but genuinely useful ergonomic touch when the printer sits on a shelf above eye level.
Here’s what the spec sheet won’t tell you, but user reports suggest: software polish is the real gap between this and the Bambu equivalents. Anycubic’s own slicer doesn’t yet match Bambu Studio’s adaptive purge-volume algorithms, so colour transitions tend to waste a touch more filament than the equivalent Bambu setup, though third-party OrcaSlicer support narrows that gap for anyone willing to spend an hour configuring profiles.
Pros:
- ✅ Built-in filament drying removes need for a separate dryer
- ✅ Expandable to eight colours with a second ACE Pro unit
- ✅ Competitive pricing against the equivalent Bambu bundle
Cons:
- ❌ Slicer software less refined than Bambu Studio’s purge algorithms
- ❌ Smaller community and fewer third-party accessories
Priced in the £500-600 range at the time of research, this is a genuinely credible alternative for buyers who want AMS-equivalent functionality without being locked into a single brand’s ecosystem.
5. Creality K2 Plus Combo — best for large-format, high-colour-count projects
The 350mm build volume matters specifically because the most demanding multicolour projects — full cosplay helmets, dense terrain sets, architectural models — also tend to be the largest ones, and on a smaller 220mm printer those objects have to be split into sections and carefully realigned after printing so the colour boundaries match up. The K2 Plus prints them as one piece with consistent colour registration across the whole build plate, which is the single biggest reason to consider it over the smaller Bambu machines.
The enclosed, heated chamber keeps temperatures stable through the extended print times that multicolour work demands — a dense sixteen-colour terrain piece can easily run past twenty hours, and on an open-frame printer, ordinary ambient temperature swings over that time would be enough to ruin the print. Dual AI cameras monitor for failures during those marathon sessions, which matters enormously once a single print represents a full day’s electricity and filament investment.
Daisy-chain as many as four CFS units together and the K2 Plus stretches to a full sixteen colours in one job, though it’s worth flagging honestly: the CFS purge mechanism handles same-material colour changes reliably, but owners report it can clog when the transition is between genuinely different materials, PLA to TPU being the classic example. This is exactly the kind of caveat a spec sheet won’t volunteer, but it matters if you’re planning mixed-material prints rather than pure colour swaps.
Pros:
- ✅ 350mm build volume handles large single-piece multicolour prints
- ✅ Expandable to sixteen colours across four CFS units
- ✅ Dual AI cameras catch failures during long print runs
Cons:
- ❌ CFS system can jam on dissimilar-material transitions
- ❌ Significantly pricier than the Bambu and Anycubic alternatives
Expect to pay in the £1,100-1,300 range for the full Combo bundle — a genuine investment, but one that makes sense specifically for buyers whose projects are too big or too colour-heavy for the smaller machines on this list.
6. Snapmaker U1 — zero-waste toolchanging without the flagship price
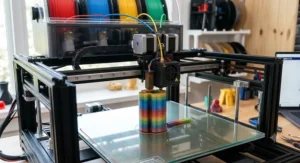
This is the lesser-known but genuinely high-quality alternative that deserves far more attention than it gets. Instead of purging filament through one shared nozzle, the U1 physically swaps in an entire toolhead for each colour change, and independent reviewers clock that swap at roughly five seconds — a fraction of the roughly two minutes a typical purge-and-swap cycle takes on a comparable single-nozzle multicolour printer. That speed difference compounds fast on prints with dozens of colour changes.
Because each toolhead has its own dedicated nozzle, there’s essentially no purge waste to manage — the material saving alone can offset a meaningful chunk of the higher purchase price if you print colour-heavy models regularly. It ships with four toolheads pre-installed with hotends, runs on open Klipper-based firmware, and slices through the free Snapmaker Orca slicer rather than a paid or closed ecosystem.
Here’s what most buyers overlook about toolchangers generally: they trade purge waste for a different kind of complexity — four separate hotends mean four things that can eventually need maintenance, rather than one. Based on the spec comparison, this is the machine for anyone who prints multicolour models, cosplay props or display pieces on a regular enough basis that filament waste and swap time genuinely affect their budget and turnaround.
Pros:
- ✅ Near-zero filament waste thanks to dedicated per-colour nozzles
- ✅ Roughly five-second toolhead swaps versus minutes on purge systems
- ✅ Open Klipper firmware with no recurring software cost
Cons:
- ❌ Smaller 230×230×250mm build volume than the K2 Plus or Prusa XL
- ❌ Four separate hotends add long-term maintenance complexity
At roughly £850-950 in the UK at the time of research, it sits in an odd but genuinely useful gap between the purge-based mid-range machines and the far pricier Prusa XL — a strong pick for anyone who has decided waste, not price, is their biggest frustration with multicolour printing.
7. Prusa XL (5-toolhead) — the professional’s zero-waste workhorse
Announced in 2022 and shipped the following year, the Prusa XL was among the first toolchanging printers to reach a mass-market audience, and the five-toolhead configuration remains the most capable machine on this list for anyone treating multicolour printing as a professional or small-business activity rather than a hobby. A kinematic coupling system paired with a load-cell sensor handles fully automatic first-layer calibration, and that mechanical precision is a large part of why Prusa’s reputation for reliability persists even at this price point.
The fifth toolhead is where things get genuinely clever: it frees you up to run soluble PVA support material alongside four colours of your main filament, or to combine two different engineering materials with three colours in the same part — a genuinely useful capability for functional parts that need both structural rigidity and a flexible grip section in one continuous print. The 360x360x360mm build volume is the largest on this list, opening up production-scale batches or genuinely large single-piece prints without splitting.
Here’s what the spec sheet won’t tell you outright: this is an open-source machine, firmware included, which appeals enormously to buyers who want to inspect, tweak or extend how their printer works rather than accept a closed ecosystem. Prusa has also been steadily expanding the toolhead lineup for the XL, including a toolhead for liquid silicone materials built in partnership with Filament2 and a pick-and-place toolhead aimed at light automation work, suggesting Prusa is positioning the XL as a platform rather than a static product.
Pros:
- ✅ Zero filament waste across all five independent toolheads
- ✅ Load-cell calibration delivers exceptional first-layer reliability
- ✅ Open-source firmware and an expanding toolhead ecosystem
Cons:
- ❌ Substantially more expensive than every other printer in this guide
- ❌ Five separate hotends mean a steeper maintenance learning curve
Expect to pay in the £2,500-2,800 range for the full five-toolhead configuration, which puts it well outside hobbyist budgets — but for small studios, model shops or anyone billing clients for multicolour work, the waste savings and reliability can pay that premium back over time.
Practical Usage Guide: Getting Your Multi-Colour Printer Set Up Right
The first thirty days with any new multi-colour FDM 3D printer determine whether you fall in love with the hobby or quietly shelve it in frustration. Start with a single-colour calibration print before you even touch the AMS, CFS or toolchanger — this confirms your bed levelling, first-layer adhesion and basic flow rate are correct before you introduce the added complexity of colour switching. Skipping this step is, honestly, the single most common mistake first-time buyers make.
Once that baseline print looks clean, load your filament system with contrasting colours rather than similar shades for your first multicolour test — it’s far easier to spot purge tower inconsistencies or colour bleed when you’re printing red-on-white than navy-on-black. Keep a maintenance schedule from day one: clean the PTFE tubes feeding your AMS or CFS every few hundred grams of filament, since dust and filament shavings accumulate faster in multi-spool systems than in single-spool setups, and a partially blocked tube causes intermittent under-extrusion that’s maddening to diagnose later.
One optimisation trick that Amazon listings never mention: pre-dry your filament before loading it, even if your system (like the Anycubic ACE Pro) claims active drying. Active drying maintains dryness during storage inside the unit — it doesn’t necessarily rescue filament that’s already absorbed weeks of ambient moisture before you loaded it. A cheap filament dryer run for four to six hours before your first big multicolour job removes a huge chunk of the stringing and popping complaints that flood community forums.
Real-World Scenarios: Who Actually Needs a Multi-Material 3D Printer
Abstract spec comparisons only get you so far, so let’s ground this in actual buyer profiles. Consider a university student sharing a halls-of-residence room, printing D&D miniatures and phone accessories a few times a month on a tight budget — the compact Bambu Lab A1 mini Combo genuinely suits this use case, since the build volume ceiling rarely matters for small figurines, and the low upfront cost matches irregular, low-volume use.
Now picture a small Etsy seller producing cosplay props and architectural scale models for clients, printing most days and needing consistent large-format colour registration — this is precisely the profile the Creality K2 Plus Combo was built for, where the 350mm build volume and sixteen-colour ceiling directly translate into fewer split prints and less post-assembly touch-up work, which matters when you’re billing by the hour.
Finally, think about a small product-design studio prototyping multi-material parts — rigid PLA bodies with TPU grips, or PETG housings with soluble PVA supports for complex internal geometry — several times a week for paying clients. This is where the zero-waste toolchanging of the Prusa XL or the far cheaper Snapmaker U1 genuinely earns its keep, since purge waste on a purging system scales badly with print frequency, and the material savings compound month over month in a way a hobbyist printing occasionally would never notice.
Buyer’s Decision Framework
Rather than agonising over spec sheets for a week, run through this quick priority checklist:
- If your budget is under £400 and you’re printing occasionally, choose the Bambu Lab A1 mini Combo or Bambu Lab A1 Combo, because AMS lite delivers reliable four-colour output without the running costs of a bigger system.
- If you print regularly and want the most polished software experience, choose the Bambu Lab P2S Combo, because the enclosed chamber and active drying solve the two most common failure points in multicolour printing.
- If your projects are large, detailed or colour-heavy (terrain, cosplay, architectural models), choose the Creality K2 Plus Combo, because build volume and colour-count ceiling matter more here than raw speed.
- If filament waste genuinely bothers you and you print multicolour models often, choose the Snapmaker U1, because toolchanging eliminates the purge tower entirely for a fraction of Prusa’s asking price.
- If you’re running a business around multi-material functional parts, choose the Prusa XL, because the reliability, open ecosystem and five-toolhead flexibility justify the premium at production scale.
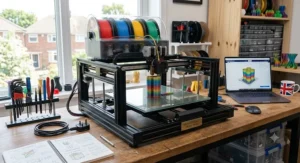
How to Choose a Multi-Colour FDM 3D Printer
What is a multi-colour FDM 3D printer? It’s a fused deposition modelling machine that automatically feeds and swaps between two or more filament spools during a single print job, using either a purging system (AMS, CFS, ACE Pro) or a toolchanger, so you get multi-coloured or multi-material objects without manually pausing to change spools.
Working through a purchase methodically saves a lot of buyer’s remorse later. Here’s the process we’d recommend:
- Decide your build volume needs first. Figure out the largest object you realistically plan to print before comparing colour systems — a bigger AMS won’t help if the printer bed itself is too small.
- Choose your system type deliberately. Purging systems (AMS, CFS, ACE Pro) are cheaper and more compact; toolchangers waste almost no filament but cost considerably more.
- Check for an enclosed chamber if you’ll use ABS or ASA. Open-frame printers struggle with warping on these materials regardless of colour capability.
- Factor in drying. Systems like the AMS 2 Pro and ACE Pro dry filament in place; without that, budget for a separate filament dryer.
- Look at expansion headroom. If sixteen-colour prints appeal down the line, confirm the system supports daisy-chaining extra units before you buy.
- Read genuine owner reviews, not just manufacturer claims. Independent testing, such as Which?’s hands-on 3D printer testing programme, which has put entry-level models from brands including Bambu, Creality and Anycubic through consistent lab conditions, is a far more reliable signal than marketing copy.
- Budget for consumables, not just the printer. Filament, nozzles and occasional PTFE tube replacements add up over a year of regular multicolour printing.
✨ Don’t Miss These Exclusive Deals!
🔍 Take your multi-colour 3D printing to the next level with these carefully selected machines. Click on any highlighted item to check current pricing and availability — these printers will help you create authentic, colourful projects your whole household will love!
AMS-Compatible 3D Printer vs Traditional Colour-Changing Filament
There’s genuine confusion between two very different approaches sold under the loose banner of “colour changing,” and it’s worth untangling properly. An AMS-compatible 3D printer uses automated hardware — a physical unit that holds multiple spools and mechanically feeds, cuts and splices filament according to the slicer’s instructions. A colour-changing filament, by contrast, is a single spool that shifts hue based on temperature, layer height or printing speed, with zero additional hardware required.
| Factor | AMS-Compatible System | Colour-Changing Filament |
|---|---|---|
| Hardware cost | £150-£1,000+ for the module | £0 — works on any printer |
| Colour control | Precise, designer-chosen placement | Gradual, gradient-style transitions |
| Waste generated | Purge waste per colour change | None |
| Best For | Sharp, deliberate multi-colour designs | Casual, hands-off gradient effects |
The analysis here is straightforward once you see it laid out: colour-changing filament is genuinely the better choice if you want zero hassle and don’t need precise colour boundaries — a single spool that shifts from teal to purple across a vase looks fantastic with no hardware investment at all. An AMS-compatible 3D printer, however, is the only realistic route if you need a logo in exact brand colours, a miniature painted in specific factions’ colours, or sharp boundaries between materials with different mechanical properties. What most buyers overlook is that you don’t have to choose exclusively — most AMS, CFS and ACE Pro systems happily run colour-changing filament in one slot alongside standard filament in the others, giving you both effects in a single print.
Common Mistakes When Buying a Multi-Colour FDM 3D Printer
Buyers new to this category make a handful of predictable mistakes, and knowing them in advance saves both money and frustration. The first is buying purely on colour count without checking build volume — a sixteen-colour system attached to a 180mm bed is still a 180mm printer, and colour count is meaningless if your actual project won’t physically fit.
The second common error is underestimating purge waste as a running cost. A single colour change typically wastes somewhere in the region of 10-20 grams of filament as the old colour flushes through before the new one prints cleanly, and a busy four-colour model can rack up 100-300 grams of pure waste depending on its size and how often the colours change. Over a year of regular multicolour printing on a purging system, that waste adds up to real money that rarely factors into the initial purchase decision.
Third, buyers frequently ignore chamber enclosure entirely, assuming any printer can handle any filament. Open-frame budget machines genuinely struggle with ABS, ASA and other engineering materials prone to warping — if your multicolour ambitions extend beyond PLA and PETG, an enclosed chamber isn’t optional, it’s essential. Finally, plenty of first-time buyers skip checking software ecosystem maturity, assuming all slicers handle multicolour purge optimisation equally well — as we noted earlier, that assumption doesn’t hold up in practice, and it directly affects both print time and filament waste.
Long-Term Cost & Maintenance: The Real Price of Multi-Colour Printing
The sticker price on any of these seven printers is only the opening bid. Ongoing costs split into three buckets: filament (including purge waste), replacement parts, and drying equipment if your system lacks built-in drying.
| Cost Factor | Purging Systems (AMS/CFS/ACE Pro) | Toolchangers (Snapmaker U1/Prusa XL) |
|---|---|---|
| Filament waste per print | 100-300g on complex multicolour jobs | Near zero |
| Nozzle wear | Single nozzle, moderate wear | Multiple nozzles, distributed wear |
| Drying equipment | Needed unless system includes it | Needed unless system includes it |
| Best For | Occasional to moderate multicolour use | Frequent, colour-heavy production |
Looking at the table, the crossover point is roughly this: if you’re printing multicolour models a handful of times a month, purge waste on an AMS or CFS system amounts to a relatively small annual filament cost, and the lower purchase price of something like the Bambu Lab A1 Combo wins comfortably on total cost of ownership. If you’re printing colour-heavy models several times a week, though, that purge waste compounds fast enough that the higher upfront cost of the Snapmaker U1 can pay for itself within a year or two purely in saved filament, before you even factor in the time saved from faster toolhead swaps.
Maintenance-wise, purging systems need periodic PTFE tube cleaning and occasional cutter blade replacement as they wear from repeatedly slicing filament. Toolchangers need each individual hotend maintained on its own schedule, which is more total maintenance events but distributes wear more evenly rather than hammering a single nozzle constantly.
Safety, Regulations & Compliance in the UK
Multi-colour 3D printers are, first and foremost, mains-powered heated appliances, and it’s worth understanding what regulatory protection actually applies before you plug one in. Electrical goods sold in Great Britain must meet conformity requirements, and manufacturers can currently demonstrate this through either the UKCA marking or the continuing recognition of CE marking, depending on the product category and when it was placed on the market. In practical terms, this means checking that any printer or filament-handling module you buy carries a recognised conformity mark, rather than assuming an unbranded import automatically meets UK safety standards.
Heated beds and enclosed chambers on printers like the Bambu Lab P2S Combo and Creality K2 Plus Combo run at genuinely high temperatures for extended periods, so basic precautions matter: never leave a multicolour print unattended overnight without smoke detection nearby, keep the printer on a non-flammable surface, and ensure ventilation if you’re printing ABS or ASA, both of which release fumes worth keeping out of an unventilated bedroom.
There’s also an end-of-life consideration that’s easy to overlook. When a printer, AMS unit or CFS module eventually fails beyond repair, it falls under the same electrical and electronic equipment waste rules that cover any other electrical appliance in the UK — meaning it shouldn’t go in general household waste, and most local recycling centres accept small electricals specifically for this purpose.
Features That Actually Matter (And Those That Don’t)
Marketing copy loves to bury genuinely useful features under flashy but marginal ones, so here’s an honest filter. Features that actually matter: active filament drying (solves a real, common failure mode), an enclosed chamber if you’ll print anything beyond PLA, and reliable AI failure detection on long multicolour prints, since a twenty-hour print failing at hour eighteen is a genuinely painful waste of time and material.
Features that matter far less than the spec sheet implies: maximum headline print speed in isolation, since multicolour prints rarely run at maximum speed throughout — the colour-change pauses dominate the total print time far more than raw mm/s figures suggest. Similarly, extreme colour-count ceilings (sixteen colours, say) sound impressive but are largely irrelevant unless you’re specifically designing prints that use that many distinct materials — most multicolour projects genuinely use two to five colours, and paying a premium for headroom you’ll never use is money better spent elsewhere.
Frequently Asked Questions
❓ What's the difference between AMS and CFS?
❓ Do multi-colour 3D printers waste a lot of filament?
❓ Can I add multicolour capability to a printer I already own?
❓ Is a toolchanger better than an AMS-style system?
❓ What filament works best in a multi-colour FDM 3D printer?
Conclusion
If there’s one honest takeaway from all seven of these machines, it’s that “multi-colour” isn’t a single feature you’re buying — it’s a whole category of trade-offs between cost, waste, build volume and maintenance complexity, and the right answer genuinely depends on how often you’ll actually use it. For most people dipping a toe in, the Bambu Lab A1 Combo remains the sensible starting point: capable, well-supported and priced to forgive a few early mistakes. Buyers who print seriously and often should weigh the Bambu Lab P2S Combo or Anycubic Kobra S1 Combo for the drying and reliability upgrades, while anyone chasing large-format or high-colour-count work should look hard at the Creality K2 Plus Combo.
The toolchanging Snapmaker U1 and Prusa XL deserve more attention than they typically get in this conversation, because eliminating purge waste entirely changes the maths for frequent multicolour printers in ways a bigger AMS simply can’t. Whichever direction you lean, checking current prices and genuine owner feedback before buying will serve you far better than chasing the highest colour count on a spec sheet — a printer that reliably delivers four clean colours beats one that unreliably promises sixteen, every single time.
Recommended for You
- Large Format FDM 3D Printer: 7 Big-Build Picks for 2026
- Enclosed FDM 3D Printer for ABS: 7 Picks Tested for 2026 (No Warping)
- Best Mid-Range FDM 3D Printer 2026: 7 Top Picks Ranked
Disclaimer: This article contains affiliate links. As an Amazon Associate, I earn from qualifying purchases. If you purchase products through these links, we may earn a small commission at no additional cost to you.
✨ Found this helpful? Share it with your friends! 💬🤗
