In This Article
What is a 3D printer for cosplay props? It is a desktop or large-format machine, usually built around fused filament fabrication (FFF), that turns digital models into wearable helmets, armour plates, blasters and accessories. You print the parts, join the seams, then sand, prime and paint. The right machine balances build volume, speed and material choice against your budget and bench space.
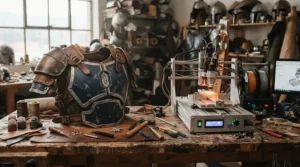
Not so long ago, a cosplay build meant a garage full of EVA foam, contact adhesive and a heat gun that had seen better days. Now a spool of PLA+ and a decent overnight run can produce a helmet shell that looks injection-moulded. If you’re shopping in the UK in 2026, the choice of 3D printer for cosplay props has never been wider or, frankly, more confusing.
Here’s the catch most buying guides skip: size and speed decide your happiness far more than brand loyalty. Roundups aimed at cosplayers note that a full armour set can run past 200 print hours. One reports a Mandalorian-style helmet at 0.2 mm layers taking 35-40 hours on an older machine. Every seam you glue is a seam you must fill, sand and hide before paint. A bigger bed, faster motion and a printer that survives long unattended runs are worth real money.
This guide compares seven real machines, from a compact starter to a half-metre monster, plus one resin printer for fine detail. It also explains the FDM vs resin printer for cosplay props decision, post-processing filler technique and armour building workflows. One honest note: everything here rests on published specifications and aggregated reviewer and owner feedback, not personal testing. Where the evidence is thin, I say so.
Quick Comparison: 3D Printer for Cosplay Props at a Glance
| Product | Type | Build volume (mm) | UK price range (approx.) | Best For |
|---|---|---|---|---|
| Bambu Lab A1 Mini | Open-frame FDM | 180 × 180 × 180 | around £170-£250 | Beginners, badges, small armour details |
| Bambu Lab P1S | Enclosed FDM | 256 × 256 × 256 | around £450-£650 | Fast all-rounder for sectional builds |
| Elegoo Neptune 4 Max | Open-frame FDM | 420 × 420 × 480 | around £300-£450 | Big PLA/PETG parts on a budget |
| Anycubic Kobra 3 Max | Open-frame FDM | 420 × 420 × 500 | around £400-£600 | Tall builds with multicolour options |
| QIDI Plus 4 | Enclosed, heated-chamber FDM | 305 × 305 × 280 | around £550-£650 | ABS/ASA armour that must survive con heat |
| Sovol SV08 Max | CoreXY FDM | 500 × 500 × 500 | around £900-£1,300 | One-piece helmets, chest plates, long blades |
| Elegoo Saturn 4 Ultra | Resin (MSLA) | 219 × 123 × 260 | around £350-£500 | Gems, insignia, fine greebles |
Read the table as three tiers. The Bambu Lab A1 Mini and Bambu Lab P1S favour reliability and speed over size, while the Elegoo Neptune 4 Max, Anycubic Kobra 3 Max and Sovol SV08 Max favour volume. The QIDI Plus 4 is the odd one out, giving up bed size for a chamber that tames tough plastics, and the Elegoo Saturn 4 Ultra is a specialist you add rather than start with. If your budget is under £500, the real question is whether you want fewer seams (Elegoo Neptune 4 Max) or fewer headaches (Bambu Lab P1S).
💬 Just one click — help others make better buying decisions too!😊
Top 7 Picks: Best 3D Printer for Large Cosplay Props and Beyond
The best 3D printer for large cosplay props is rarely the fastest or the flashiest. It’s the one whose bed fits your biggest part with the fewest compromises. Prices below are ranges, so check current price before buying.
1. Bambu Lab A1 Mini — best entry ticket for small props
The Bambu Lab A1 Mini is the cheapest sensible way to learn the whole prop workflow before committing to a bigger machine. Its 180 × 180 × 180 mm build volume is the catch. An adult helmet measures roughly 250-290 mm wide and 280-330 mm tall, according to a QIDI printing guide, so on this machine a helmet becomes a jigsaw of several sections. Visors, buckles, badges, pauldron trim and blaster details print quickly and cleanly. Big shells turn into a patience-and-glue project.
My analysis: this is for someone who wants to find out whether they enjoy printing before spending £500 or more. It also makes a smart second machine for detail parts once you own a big one. Roundups such as GeekBitz name it the best budget pick for beginners and smaller props. The recurring caveat is size. I couldn’t verify enough individual owner reviews to characterise them further.
Pros:
- ✅ Very low cost of entry
- ✅ Quick to set up and learn on
- ✅ Ideal for accessories and detail parts
Cons:
- ❌ Helmets need many sections and seams
- ❌ Open frame limits ABS and ASA use
Price: around £170-£250. Verdict: excellent value for small or sectional builds, poor value if you dream of one-piece armour.
2. Bambu Lab P1S — enclosed, fast and ready for overnight runs
The Bambu Lab P1S earns its reputation by removing friction. It has an enclosed CoreXY frame, a 256 × 256 × 256 mm bed, auto bed levelling, a built-in camera and support for AMS multicolour systems. Roundups quote speeds up to 500 mm/s. Treat that as a peak, since curved helmet walls run slower. The enclosure matters more than the number: it steadies temperatures for tougher plastics and keeps drafts off long prints.
On paper, 256 mm suits helmets and chest pieces in two to four sections. That’s a fair compromise if you’d rather sand three tidy seams than fight an open-frame giant. Reviewers consistently praise speed and out-of-the-box print quality. Owner threads also report AMS filament-feed errors, nozzle clogs and patchy support experiences. Bambu said in February 2026 that the P1S would stay on sale, but forum discussion suggests a newer P2S now exists, so check which is current.
Pros:
- ✅ Fast, dependable overnight printing
- ✅ Enclosed for ABS and ASA experiments
- ✅ Polished slicer and monitoring workflow
Cons:
- ❌ Bed limits helmets to sections
- ❌ AMS and support complaints recur in owner threads
Price: around £450-£650, more with AMS. Verdict: the safest all-rounder if you’d rather finish props than tinker.
3. Elegoo Neptune 4 Max — cheapest route to a 420 mm bed
The Elegoo Neptune 4 Max offers 420 × 420 × 480 mm for far less than most rivals. It runs Klipper firmware and claims up to 500 mm/s, with a 300 °C nozzle. Its bed tops out at 85 °C, which is fine for PLA and PETG, and workable for ABS only with an enclosure. As a bed-slinger, it moves a heavy bed back and forth, so real-world speeds on tall parts sit well below the headline figure.
The payoff is fewer seams. Roundups say it can print adult-sized helmets in one go, which trims hours of gluing and filling. The trade-off shows in feedback. Praise for size-per-pound sits alongside complaints about bed-levelling drift, worn Y-axis wheels and replacement parts shipped from China. UK-store Trustpilot reviews of Elegoo are mixed on warranty support. Budget for spares, and don’t make it your only printer if you have a con deadline.
Pros:
- ✅ Huge bed at a low price
- ✅ Klipper firmware is quick and tweakable
- ✅ Prints many helmets in one piece
Cons:
- ❌ Levelling and reliability complaints recur
- ❌ Spare parts can mean slow downtime
Price: around £300-£450. Verdict: the best value per litre of build space, if you accept some tinkering.
4. Anycubic Kobra 3 Max — tall bed for blades and staffs
The Anycubic Kobra 3 Max gives 420 × 420 × 500 mm, and that 500 mm height is handy for long props. It pairs with the ACE Pro system for four-colour printing and ships with Anycubic Slicer Next, which is based on OrcaSlicer. Advertised speeds reach 600 mm/s. Tom’s Hardware described it as a big improvement over the Kobra 2 Max, praising auto-levelling, input shaping and decent speed. It also noted the software was half-finished at launch.
Feedback is genuinely split. One third-party test of six units reported variable quality, firmware instability and slow support, while other reviewers found it dependable. Multicolour purging also wastes filament, which barely matters for props you’ll paint anyway. My advice: buy from a retailer with straightforward UK returns, and check the firmware version before your first big print.
Pros:
- ✅ Very large bed and tall Z height
- ✅ Familiar Orca-based slicer
- ✅ Multicolour option for detail parts
Cons:
- ❌ Reports of unit-to-unit variability
- ❌ Proprietary firmware and purge waste
Price: around £400-£600, more with ACE Pro. Verdict: strong for big builds if you buy carefully and expect some early tuning.
5. QIDI Plus 4 — heated chamber for tough ABS and ASA armour
The QIDI Plus 4 trades bed size for chamber control. It offers 305 × 305 × 280 mm, a 370 °C hotend, a 120 °C bed and an actively heated chamber rated to 65 °C. That heat fights the warping and layer cracking that ruin big ABS panels. ABS and ASA also cope with convention heat better than PLA. It weighs roughly 27 kg, so clear a sturdy bench.
At 305 mm it typically prints a helmet in two halves, not one piece. Tom’s Hardware liked the build and technical-filament results, but found filament loading fiddly and advised removing the lid for PLA. Community commentary credits QIDI with quick free replacement parts. Note that QIDI launched a Plus 5 in August 2026, so Plus 4 stock and pricing may shift.
Pros:
- ✅ Active chamber heating for ABS and ASA
- ✅ Hardened, high-temperature hotend
- ✅ Solid, heavy build
Cons:
- ❌ Bed smaller than the budget giants
- ❌ Heavy, and filament loading can be fiddly
Price: around £550-£650. Verdict: the pick for outdoor, durable, wearable armour, not for one-piece PLA helmets.
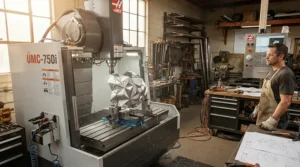
6. Sovol SV08 Max — half a metre in every direction
The Sovol SV08 Max offers 500 × 500 × 500 mm (450 mm tall with the enclosure kit). It uses a CoreXY flying-gantry design with linear rails, eddy-current levelling and Klipper. Claimed speeds reach 700 mm/s, and the nozzle goes to 300 °C. In practice, that space swallows whole helmets, chest plates and long blade sections, which removes most sectional gluing.
Tom’s Hardware called it a monster but not a beginner machine. Expect setup effort, real desk space and higher running costs. Product-page feedback is mixed. Some owners praise responsive support, while one reports the slicer’s device tab disconnecting after each print. Reviewers priced it around $1,100-$1,500 in 2026, depending on the enclosure.
Pros:
- ✅ Enormous one-piece build capacity
- ✅ Rigid CoreXY frame with linear rails
- ✅ Optional enclosure and heated-chamber upgrade path
Cons:
- ❌ Needs experience and space
- ❌ Software quirks reported by owners
Price: around £900-£1,300. Verdict: only worth it if you build repeatedly and hate seams.
7. Elegoo Saturn 4 Ultra — resin detail for gems, insignia and greebles
The Elegoo Saturn 4 Ultra covers what FDM does poorly: crisp, hero-grade detail. It uses a 12K mono screen, a tilting vat and auto-levelling. Its 219 × 123 × 260 mm bed is roomy for resin, though tiny beside the FDM machines above. A 16K variant also exists. Standard resin is brittle, so pick a tough resin for wearable parts.
Tom’s Hardware called it one of the best resin printers in a long while, and Creative Bloq found it beginner-friendly. It listed a £499.99 RRP with promotions near £355. Some owners on the product page report dead-on-arrival units and slow returns. It also needs gloves, eye protection, ventilation and 90%+ isopropyl alcohol for washing.
Pros:
- ✅ Superb fine detail
- ✅ Beginner-friendly for resin
- ✅ Great for gems and small hero parts
Cons:
- ❌ Small bed, brittle standard resin
- ❌ Messy, chemical-heavy workflow
Price: around £350-£500. Verdict: a brilliant add-on, a poor first and only printer for armour.
How the Seven Compare on Paper
| Product | Enclosed? | Motion | Best material fit | Aggregated review sentiment |
|---|---|---|---|---|
| Bambu Lab A1 Mini | No | Bed-slinger | PLA, PETG | Praised for beginners; size is the limit |
| Bambu Lab P1S | Yes | CoreXY | PLA+, PETG, ABS, ASA | Fast and polished; AMS and support complaints |
| Elegoo Neptune 4 Max | No | Bed-slinger | PLA, PETG | Big value; reliability complaints |
| Anycubic Kobra 3 Max | No | Bed-slinger | PLA, PETG, TPU | Split: strong reviews, variability reports |
| QIDI Plus 4 | Yes, heated | CoreXY | ABS, ASA, nylon, CF | Well-built; heavy; fiddly loading |
| Sovol SV08 Max | Optional kit | CoreXY | PLA, PETG (more with enclosure) | Massive; not beginner-friendly |
| Elegoo Saturn 4 Ultra | Lid and filter | MSLA resin | Tough resin | Easy for resin; some DOA reports |
The pattern is clear: enclosure and motion type predict material range, while bed size predicts how much sanding you’ll do. If painted PLA+ is your plan, the Elegoo Neptune 4 Max and Anycubic Kobra 3 Max deliver the most volume. If durability matters more than seams, the QIDI Plus 4 is the sturdier choice.
Prop Making Workflow: From STL to Wearable Prop
Good prop making starts before the first layer. Roundups agree that wrong scale is the most common failure, and that a test ring is the best habit in the hobby.
- Measure your body, not your clothes. Scale the model to the wearer, then print a quick test ring or block to confirm fit before committing 30 hours.
- Split along panel lines. Hide joints where the design already has seams. Add registration keys so halves align, and glue from the inside with reinforcement.
- Pick the material for the job. PLA+ is the cosplay default: easy to sand and paint, and tougher than standard PLA. PETG is the second-best general option. ABS and ASA suit props that face heat.
- Schedule overnight runs. Long prints fail late, so use a printer with a camera or reliable first layers, and keep spare nozzles.
- Avoid first-month mistakes. Don’t print at a scale you haven’t test-fitted, don’t skip cleaning the bed, and don’t rush to paint before the surface is truly smooth.
Treat the printer as a factory, not a magic wand. A helmet’s printing time is the short bit. The seams, filler and sanding that follow decide whether it looks like a film prop or a plastic bucket.
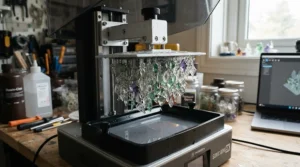
Post-Processing Filler: The Finishing Chain That Hides Layer Lines
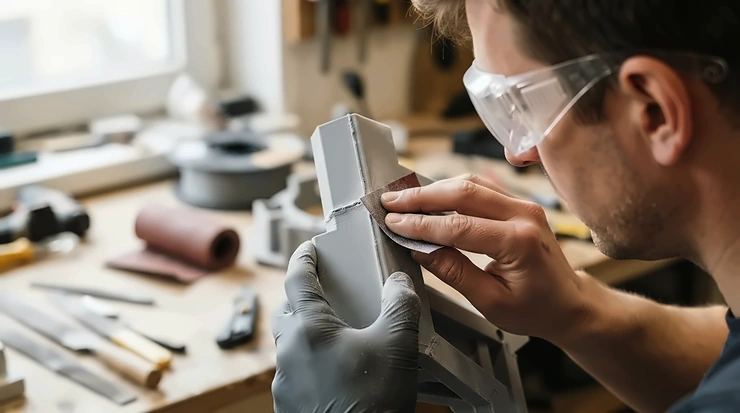
Post-processing filler is the unglamorous hero of every convincing 3D printed prop. The sequence for split parts runs like this: remove supports, assemble, work the seams, fill, sand, filler primer, paint, then clear coat.
Here’s the practical version:
- Sand first. Work from around 120 grit up to 1000, using a block sander on flat panels.
- Fill the sins. Use spot putty or lightweight filler on seams and stubborn layer valleys. Two-part epoxy putty or automotive body filler suits larger gaps. Smooth and feather the edges, let it cure fully, then sand again.
- Prime in layers. Apply 2-3 coats of high-build automotive filler primer, sanding between coats and allowing cure time. Primer also reveals low spots you missed, which is why it earns its keep.
- Consider an epoxy coating. Some makers use products like XTC-3D to smooth surfaces before sanding.
- Adapt for resin. Use UV-curable resin putty for small voids, and a light fine-mist primer so you don’t bury the detail.
Always wear a proper respirator when sanding and spraying. Sanding dust and primer fumes are not something to gamble with. Budget a weekend for finishing a helmet, and expect the post-processing filler stage to matter more to the final look than the printer brand.
Armour Building Case Studies: Three Maker Profiles
Armour building suits different budgets and spaces, so here are three profiles matched to machines through reasoning, not anecdote.
The student in a shared flat (budget around £300). Space and noise matter, and the builds are modest. The Bambu Lab A1 Mini handles accessories and sectional armour, and the small footprint helps. Expect many seams and plenty of sanding, which is a fair price for a low entry cost.
The hobbyist doing two or three cons a year (£400-£600, garage). Fewer seams means less finishing time, so a 420 mm printer pays off. The Elegoo Neptune 4 Max offers the best volume per pound, while the Anycubic Kobra 3 Max adds height for staffs and blades. Both suit painted PLA+ helmets. Keep spare parts and a return window in mind.
The repeat builder taking small commissions. Durability and throughput dominate. The QIDI Plus 4 handles ABS and ASA armour that survives hot halls, while the Sovol SV08 Max removes seams from big builds if you have the space and patience.
One UK caution: props that look like real guns need care. Under the Violent Crime Reduction Act 2006, manufacturing, importing or selling realistic imitation firearms is an offence, with limited defences such as film, theatre and re-enactment. I’m not a lawyer, so check the current rules or take advice before printing anything that resembles a real firearm. Stylised sci-fi blasters in obviously unrealistic designs are a different matter, and convention prop policies vary.
How to Choose a 3D Printer for Cosplay Props
To choose a 3D printer for cosplay props, match build volume to your largest part, pick an enclosure level that suits your materials, and prioritise reliability over headline speed. Then set a realistic budget.
- Measure your biggest part. Adult helmets run roughly 250-290 mm wide and 280-330 mm tall, so a 300 mm bed prints them in halves and 390 mm or more can manage many in one piece.
- Pick your material. PLA+ for painted props, PETG for tougher parts, ABS or ASA for heat, TPU for flexible pieces.
- Decide on an enclosure. You need one for ABS and ASA. For PLA+ and PETG it’s optional.
- Prioritise first-layer reliability. On long curved walls, a failed first layer wastes a day.
- Check UK support and spares. Find out how long replacement parts take to reach you.
- Set a total budget. Include filament, primer, sandpaper and a respirator, not just the printer.
✨ Don’t Miss These Carefully Selected Picks!
🔍 Take your prop making to the next level with the machines above. Click any highlighted product name to check current pricing and availability. Whichever you choose, you’ll be building armour that looks properly finished!
Large-Format 3D Printer for Cosplay: When Bigger Actually Pays Off
A large-format 3D printer for cosplay earns its place when seams are your biggest time sink. Every extra section is another joint to glue, fill and sand, so printing a full helmet in one piece can trim hours from finishing.
Bigger isn’t automatically better, though. A large part that fails at hour 30 wastes a lot of plastic and a whole day. Big beds also demand more power, more desk space and more patience, and the largest machines need real experience to keep dialled in. Guidance from printer makers suggests 300 × 300 × 300 mm is a good target for most helmets, and 390 mm-plus prints many in one go.
The sweet spot for most makers sits between 300 and 420 mm. That’s where the Elegoo Neptune 4 Max and Anycubic Kobra 3 Max shine on price. Go to 500 mm with the Sovol SV08 Max only if you print big regularly and have the space. And remember that a large-format 3D printer for cosplay can’t fix a poor split or a lazy finishing routine.
FDM vs Resin Printer for Cosplay Props: The Honest Comparison
The FDM vs resin printer for cosplay props debate has a fairly clear answer for most builders. FDM handles large parts, costs less per part, and produces durable, wearable armour. Resin delivers hero-grade detail for small pieces, with a smaller bed and messier workflow. Many experienced makers use both, with resin for detail and FDM for structure.
| Method | Detail | Typical size | Durability | Post-processing | Best For |
|---|---|---|---|---|---|
| FDM (e.g. Bambu Lab P1S) | Good, visible layer lines | Large | Tough, wearable | Sanding, filler, primer | Helmets, armour, weapons |
| Resin (e.g. Elegoo Saturn 4 Ultra) | Excellent | Small to medium | Brittle unless tough resin | Wash, UV cure, fine finishing | Gems, insignia, detail parts |
| EVA foam (traditional) | Low to moderate | Any, cut by hand | Flexible, light | Heat-sealing, sealing, paint | Lightweight, comfortable armour |
Read the table by priorities. FDM wins on size and toughness. Resin wins on surface finish but adds gloves, ventilation and isopropyl alcohol. Foam remains the lightest and most comfortable, and needs no printer at all.
On safety, both methods release particles or chemicals. NIOSH’s guide to safe 3D printing covers ultrafine particles and chemical risks for makerspaces, schools and small businesses. Resin adds skin-sensitisation risks, so gloves and eye protection are non-negotiable.
Features That Actually Matter (And Those That Don’t)
What matters:
- Build volume. It sets how many seams you finish.
- Material range and enclosure. These decide whether your armour survives a hot hall.
- First-layer reliability. Long prints punish shaky adhesion.
- UK support and spare parts. Downtime before a con is the real cost.
- A capable slicer. Orca-based tools give you fine control over walls, seams and supports.
What doesn’t:
- Peak speed. Curved walls and big beds rarely reach the advertised number.
- Multicolour. Props get painted, so colour systems mostly add waste and complexity.
- AI failure detection and gimmicks. Nice, but a camera and good habits do the same job.
One reviewer’s takeaway is worth borrowing: the best large printer for cosplay isn’t the one with the highest top speed. Optimise for finished props, not spec-sheet bragging rights.
Common Mistakes When Buying a 3D Printer for Cosplay Props
- Buying too small. A tiny bed turns every helmet into a jigsaw. Measure your biggest planned part first.
- Starting with resin. Resin is brilliant for detail but awkward for armour, and the workflow is messier.
- Ignoring support and spares. A cheap printer with slow parts delivery is a false economy before a con.
- Skipping ventilation. Put the printer somewhere with airflow, and consider an enclosure with filtration.
- Forgetting consumables. Filament, primer, putty, sandpaper and a respirator add up.
- Trusting headline speeds. Real speed on curved walls is far lower than the marketing number.
- Scaling wrongly. Wrong scale is the most common failure. Test-fit before the long print.
Long-Term Cost & Maintenance
Sticker price is only the start. Expect to spend on filament, nozzles, primer, putty and sanding supplies. AMS users should note one troubleshooting guide recommends replacing PTFE tubes roughly every two months under regular use. Resin printers add gloves, isopropyl alcohol, FEP films and resin, which costs more per litre than filament.
| Product | Price band | Build volume (litres) | Approx. litres per £100 (mid-range) | Hidden costs |
|---|---|---|---|---|
| Bambu Lab A1 Mini | £170-£250 | 5.8 | 2.8 | More sanding from extra seams |
| Bambu Lab P1S | £450-£650 | 16.8 | 3.1 | AMS tubing, filament waste |
| Elegoo Neptune 4 Max | £300-£450 | 84.7 | 22.6 | Spares, tuning time |
| Anycubic Kobra 3 Max | £400-£600 | 88.2 | 17.6 | Purge waste, firmware updates |
| QIDI Plus 4 | £550-£650 | 26.0 | 4.3 | Power draw, heavy to move |
| Sovol SV08 Max | £900-£1,300 | 125.0 | 11.4 | Enclosure kit, space |
| Elegoo Saturn 4 Ultra | £350-£500 | 7.0 | 1.6 | Resin, IPA, gloves, films |
These litres-per-£100 figures are my rough estimates from range midpoints, so treat them as a guide. They show the Elegoo Neptune 4 Max and Anycubic Kobra 3 Max delivering the most build space per pound, while the Sovol SV08 Max costs more but offers half a metre of room. The Elegoo Saturn 4 Ultra looks poor on volume because it is a detail tool, not an armour printer.
Safety, Ventilation and UK Prop Rules
Desktop FDM printers release ultrafine particles and volatile organic compounds, and emissions vary by printer, filament and temperature. HSE-commissioned research (report RR1146) found that a filtered enclosing hood cut particle emissions dramatically, and university summaries of that work cite reductions of about 97-99%. They also advise waiting around 20 minutes after a print before opening the enclosure. PLA generally produces fewer emissions than ABS, and emissions tend to peak at the start of a print and during failures.
For a home setup, keep the printer in a ventilated space, away from where you sleep. Choose the lowest workable temperatures and consider an enclosure with filtration. For resin, wear chemical-resistant gloves and eye protection, wash parts in 90%+ isopropyl alcohol, and never treat uncured resin casually. When sanding or spraying, use a proper respirator.
On the practical side, look for UKCA or CE marking on the printer and power supply, and keep a fire extinguisher nearby for long unattended prints. The law on prop weapons is covered in the armour building section above, and conventions publish their own prop policies, so check before you travel.
FAQ
❓ How long does it take to 3D print a cosplay helmet?
❓ Is PLA strong enough for cosplay armour?
❓ Can I take 3D printed props to a UK convention?
❓ Is a print service cheaper than buying a printer for one build?
❓ Do I need a respirator when sanding printed armour?
Conclusion
The right 3D printer for cosplay props depends on what you build, where you build it and how much finishing you’re willing to do. For beginners with small builds, the Bambu Lab A1 Mini is the gentlest start. If you want a fast, dependable all-rounder, the Bambu Lab P1S is the safest bet, provided you accept sectional builds. For fewer seams on a budget, the Elegoo Neptune 4 Max and Anycubic Kobra 3 Max offer huge beds. Durable ABS and ASA armour belongs to the QIDI Plus 4, the Sovol SV08 Max is for people who print big all the time, and the Elegoo Saturn 4 Ultra adds resin detail once you’re hooked.
Whatever you choose, the printer is only half the story. The split, the post-processing filler routine and a patient sanding ladder are what make a print look like a film prop. Measure twice, test-fit before the long run, and protect your lungs.
Recommended for You
- Resin Printer For Miniatures: 7 Best Picks For Painters (2026)
- 3D Printer For Miniatures: 7 Best Picks For UK Wargamers (2026)
- 3D Printer For Beginners: 7 Best Picks For UK Makers (2026)
Disclaimer: This article contains affiliate links. As an Amazon Associate, I earn from qualifying purchases. If you purchase products through these links, we may earn a small commission at no additional cost to you.
✨ Found this helpful? Share it with your friends! 💬🤗
